Projects and templates
Create a label at the correct physical size, build its visual structure, and expose only the values that should change at print time.
Organize templates in projects
A project is the container for related templates. From Projects you can create, rename, or delete an empty project, and create, rename, duplicate, delete, edit, or print a template.
Template IDs and project IDs are available from the interface when an external system needs stable references.
Create a template
- 1
Select the target project
Open Projects and choose the project in the left column.
- 2
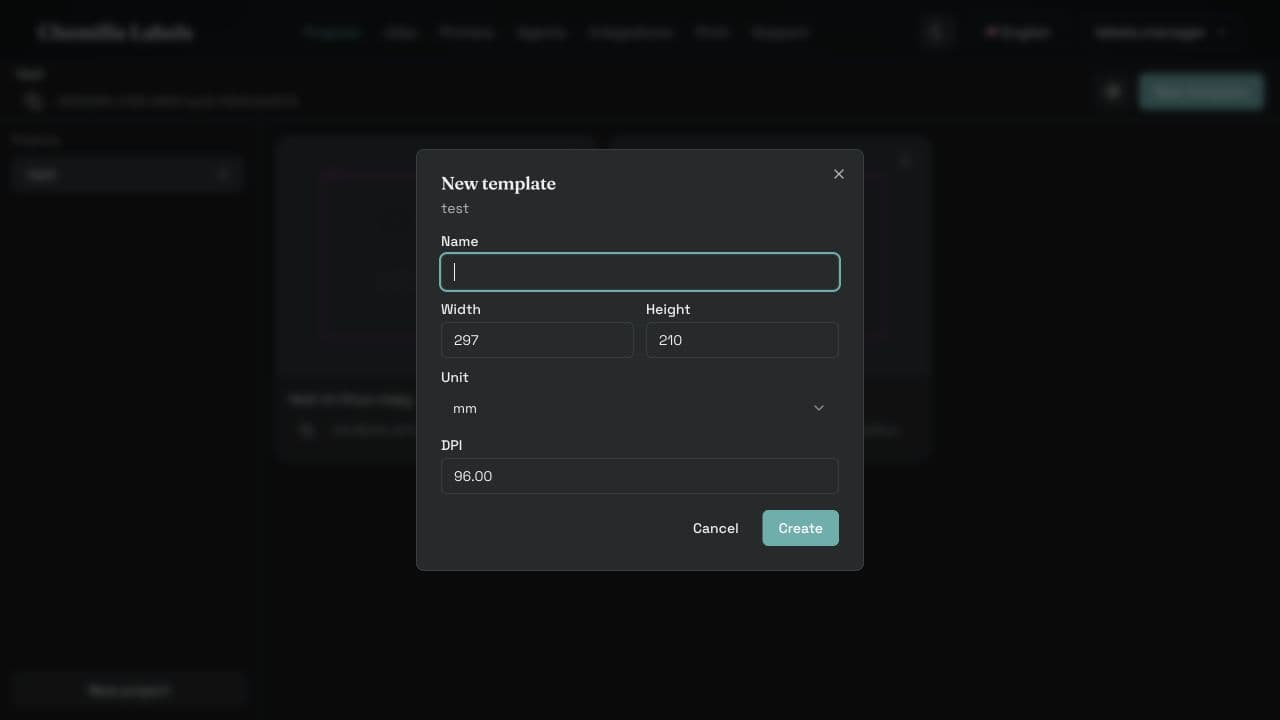
Choose New template
Enter the name and the physical width and height of the label.
- 3
Confirm unit and DPI
Use the unit expected by your production specification. Keep the DPI aligned with the intended rendering and printer setup.
- 4
Create
The template is saved and opened in the editor.
Use the editor
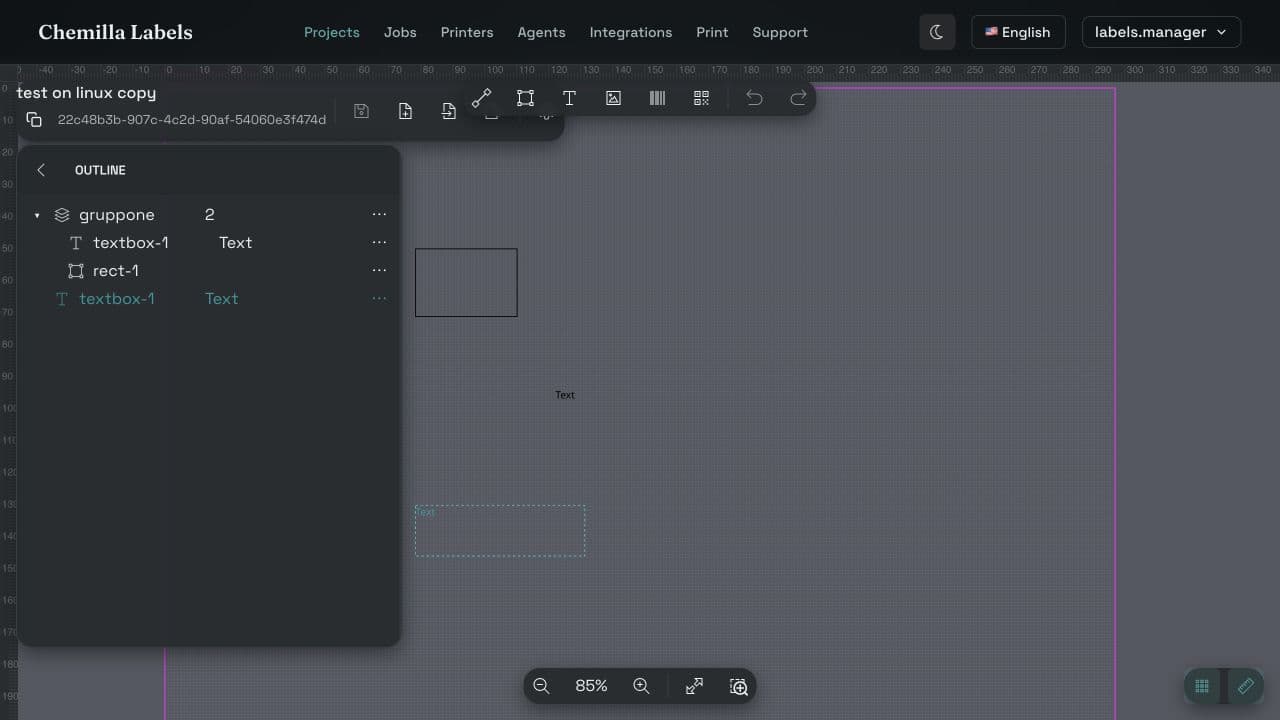
The main toolbar adds lines, rectangles, text boxes, images, barcodes, and QR codes. The outline keeps object order and groups visible while the canvas provides rulers, grid controls, zoom, and selection tools.
Save updates the current template. Save as creates a separate template. SVG import and export are available from the same status bar. Version history lets you inspect and restore an earlier saved revision.
- Use the inspector to edit geometry, appearance, text, barcode, QR, and image properties.
- Use the outline to select grouped or overlapping objects.
- Use the grid, rulers, alignment controls, and zoom-to-fit for precise placement.
- Save before leaving the editor when the save action becomes available.
Prepare dynamic fields
A dynamic field is replaced with data supplied by the Print page or API. Select a supported object, enable Is dynamic in the inspector, and assign the field name used by the incoming JSON.
Field names are matched exactly. Preserve capitalization, spaces, and symbols when building the payload.
- 1
Select the object
Choose the text, image, barcode, QR code, or supported group that should receive runtime data.
- 2
Enable Is dynamic
The editor marks the object as data-driven instead of fixed content.
- 3
Set the field name
Use a stable name such as batch, lotNumber, or expiryDate.
- 4
Verify from Print
Select the template and choose Regenerate from template to rebuild the sample JSON from detected fields.
Useful keyboard shortcuts
| Shortcut | Action |
|---|---|
| Ctrl/Cmd + Z | Undo |
| Ctrl/Cmd + Shift + Z | Redo |
| Ctrl/Cmd + A / C / V | Select all, copy, paste |
| Ctrl/Cmd + D | Duplicate selection |
| Arrow keys | Move selection by one editor unit |
| Shift + Arrow keys | Move selection by ten editor units |
| Delete / Backspace | Delete selection |